Homemade Roasted Almond Butter

imageimage
Almond butter is one of my new favorite foods, and is definitely a staple if you’re on whole 30 or eating Paleo. It’s a great source of protein and is delicious paired with a banana or apple! It can get pretty expensive at the grocery store, so I decided to try making my own. This is also a great way to monitor ingredients so there’s no added sugar or oils. It’s surprisingly easy and all you need is a large bag of whole raw almonds, an oven to roast them in, and a food processor!

I’m super excited to experiment with different flavors & types of nut butter. Maybe an almond/hazelnut blend? Maybe try adding some honey & cinnamon…. vanilla & espresso bean would be divine. So many endless possibilities. I’m in nut butter heaven!

image

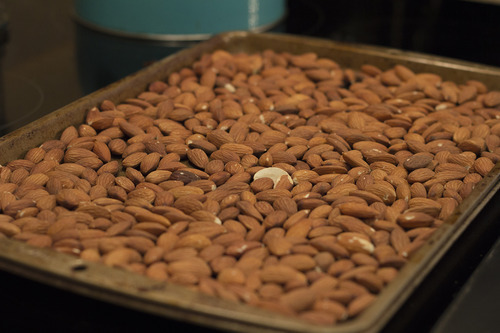
Preheat oven to 350. Measure out three cups of natural whole raw almonds. Spread evenly across baking sheet or pan, and bake for approximately 12 minutes.

image

Next, add the almonds to your food processor and begin processing.

image

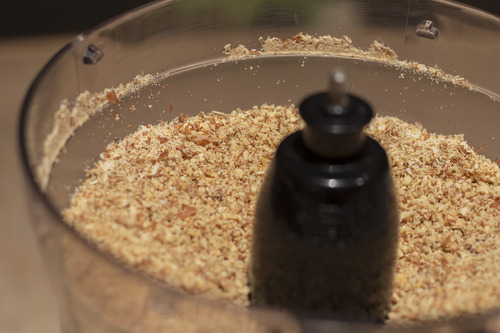
At first it will resemble almond meal. Keep processing, scraping sides as you go. It will then start to thicken and be very hard, almost cement-like. This is normal. Keep on processing! Don’t give up. Just continue processing to get the almonds to release their oils. After around 10-15 minutes it should start to get creamy. Keep going until you get to the consistency you want.

Then transfer to a mason jar or other container to store. It should keep in the refrigerator for around a month or so. (Though I’m not entirely sure as we go through a whole jar in just a few days!)

If you want to indulge a little bit – chocolate almond butter is pretty much amazing. Once the almond butter is ready I usually separate half into a mason jar for regular almond butter, and leave the other half in the processor where I then add in semi-sweet chocolate chips (between ¼- ½ cup) and process for a few minutes until blended and creamy. Then store in a separate mason jar… which you may want to hide in the back of your fridge so you do not eat the whole jar with a spoon. ;)

imageimage

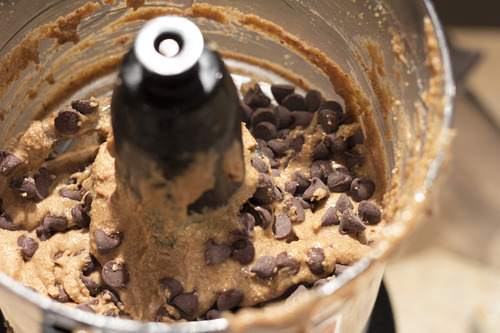
Creamy chocolately goodness. Yes, please!

Sew Simple (see what I did there?)

Untitled
Yesterday was my birthday, which snuck up on me rather quickly! Since I’m 39 weeks pregnant we decided to keep it low-key and enjoy one last date night with just the two of us before this baby comes. So we did the classic dinner & a movie and it was really nice. :)

For my birthday this year I really wanted a sewing machine. I’ve always wanted to learn, and was ready to get my own machine and finally do it! So hubby granted my wish and got me one for my birthday (which he gave to me early, over the weekend). I’m already loving it and really enjoying making some fun baby things. Plus, it provides a great distraction while I anxiously await baby girls arrival!

So for my first few projects I decided to make some baby leggings, some turban headbands for baby & mama, newborn knotted hats, and a receiving blanket. These four projects are great for beginners or anyone else wanting to make some cute new things for their precious little ones! The links to the tutorials I used are below. I used stretchy knit fabric, all purchased at Joanns (with coupons, of course!).

1. Baby Leggings Tutorial
2. Turban Headband Tutorial
3. Knotted Newborn Hat Tutorial (Note: I did not serge my ends, just sewed the whole project with a twin needle. Also, when I cut out the pattern, I cut out the top part for the knot a bit smaller, due to personal preference)
4. Receiving Blanket: I didn’t follow a tutorial. I used a double sided knit fabric, cut the size I wanted, and folded in all sides about ¼ inch and then folded in again another ¼ inch (ironing each time) and pinned in place. Then sewed with a twin needle.

Happy Sewing!

Homemade Exfoliant & Cellulite Treatment

I recently stumbled upon this homemade exfoliant and cellulite remedy. And since I am, very unfortunately, genetically inclined to get cellulite – I wanted to give it a shot. I’ve only used it once so far, so no feedback yet if it actually reduces the visibility of cellulite. BUT I do know that it’s simple, free, and leaves your skin feeling amazing.

You Will Need:

-A few tablespoons of ground coffee beans (do not use decaf)
-A tablespoon or so of honey
-Two dashes of Olive Oil
-A teaspoon of Cinnamon
-A small dash of Salt

Tip: I used the coffee grounds that I made my morning coffee with…No need to be wasteful!

Directions: Combine ingredients together in bowl, mix well. Use while in shower, massage onto skin focusing on thighs and buttocks. May be used on entire body, but would not recommend using it on your face. Rinse well.

How it works: The caffeine in the coffee is said to tighten the skin, while the grounds promote circulation. The honey disinfects, the oil naturally moisturizes the skin, and the cinnamon draws blood to the surface, which also helps with circulation.

I will use this product 3 times per week for the next two weeks and report back whether it helps reduce the appearance of cellulite.